Ok, so the title is a bit of a mouthful but here’s the scenario – you want to quickly spin up an application but you don’t want to mess around downloading and installing any of the usual development tools required to build an Uno Platform application. In this post we’re going to walk through creating an Uno Platform application directly in GitHub using GitHub Codespaces and of course using Hot Design to build out the user interface.
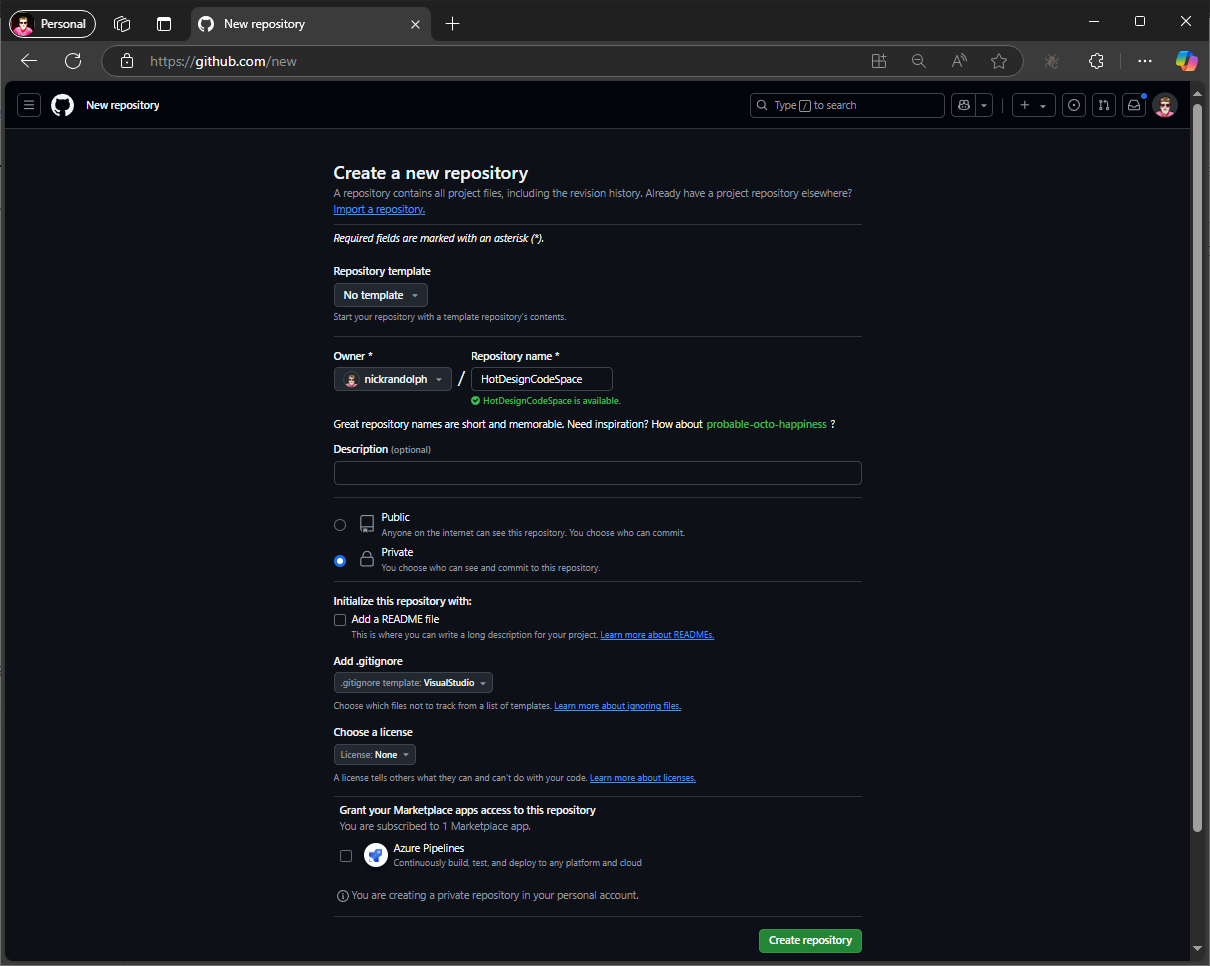
Let’s get started by creating a new repository in GitHub. This will be an empty repository, except for a default .gitignore file. Since we’re building a .NET application, it makes sense to go with the Visual Studio .gitignore template.
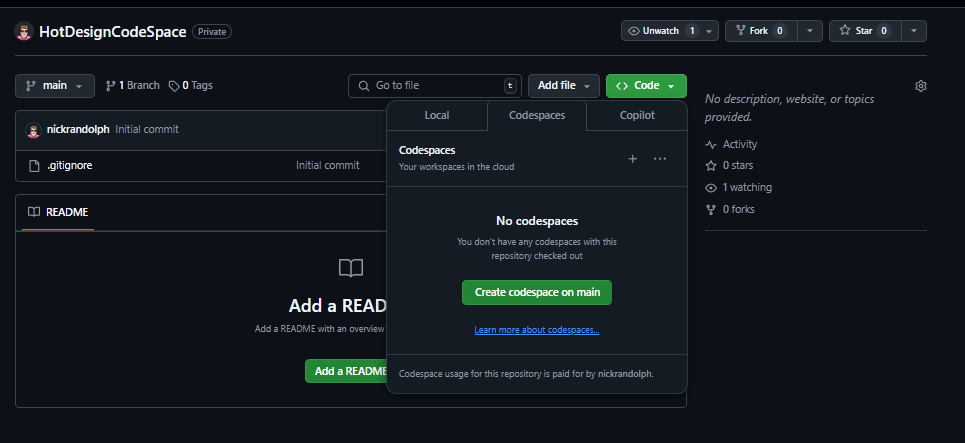
Next step is to open the repository in Codespaces. This can be done from the dropdown on the Code button.
When Codespaces opens it looks and feels very similar to VS Code, just running within the bounds of the browser

Since we’re going to be creating an Uno Platform application, let’s go ahead and install the Uno Platform extensions
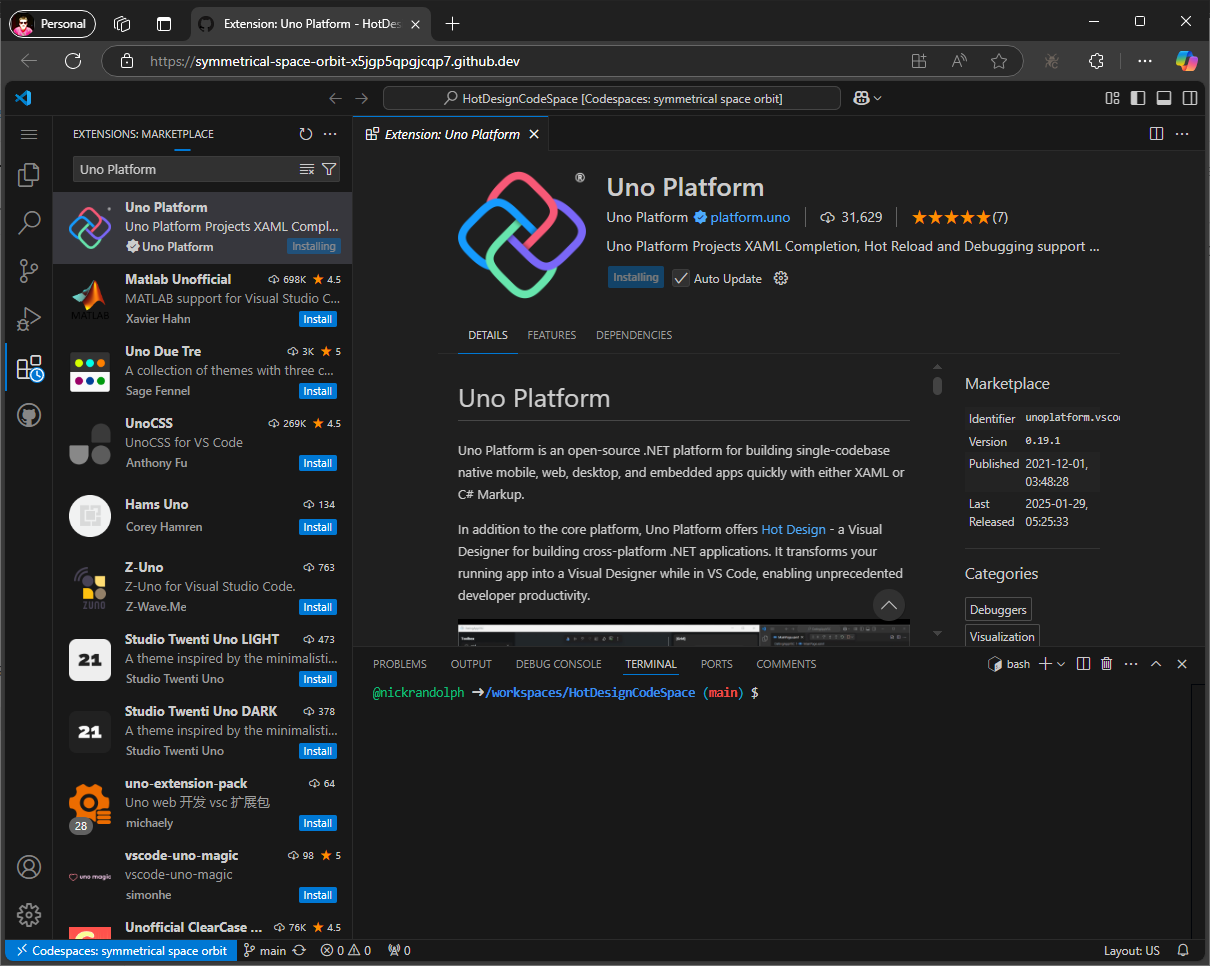
This will take a minute or two as it needs to install not only the Uno Platform extension but also the C# and C# Dev Kit extensions.
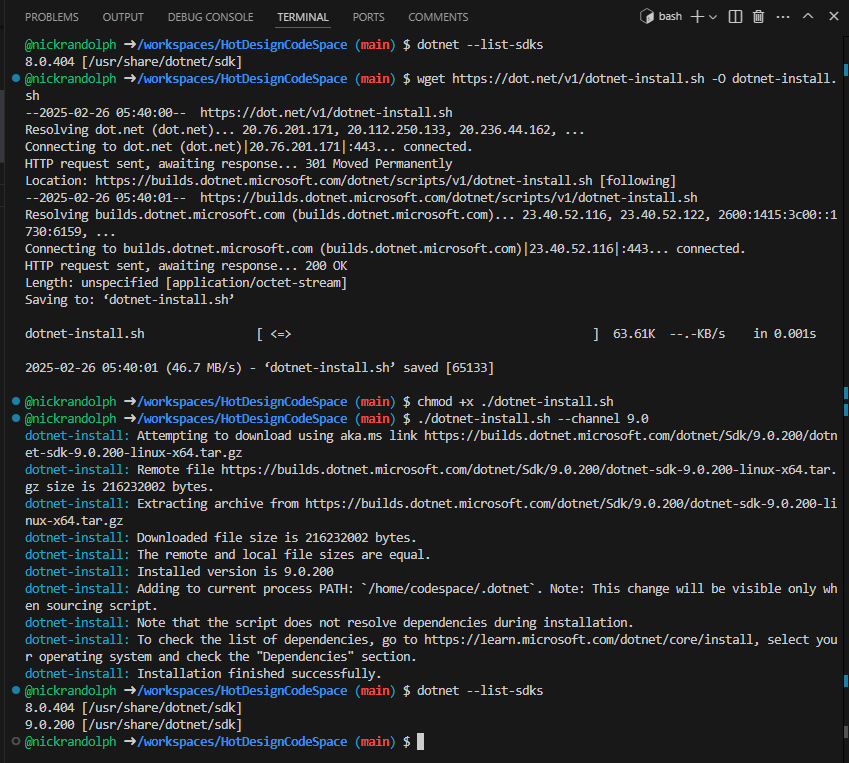
The next thing we need to do is to make sure that we have .NET 9 installed – by default Codespaces currently has version 8.0.404 of the .NET SDK installed. Follow the instructions to install .NET 9.
Next up, is to run uno-check. This is available via the command palette.
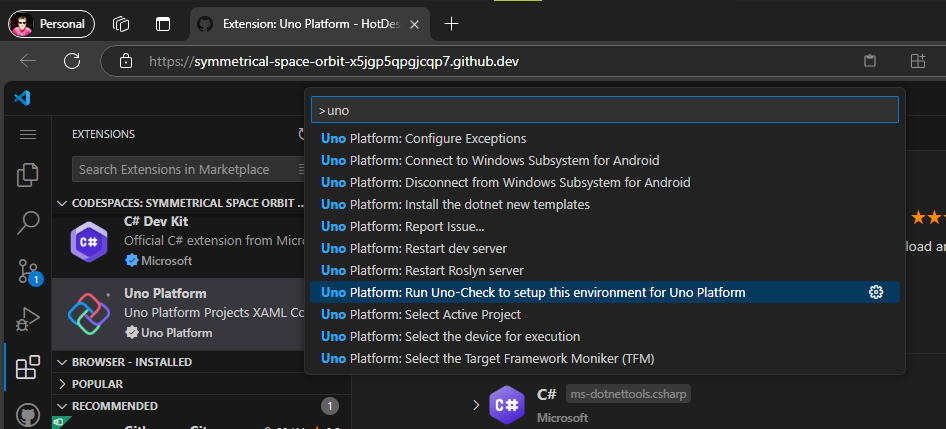
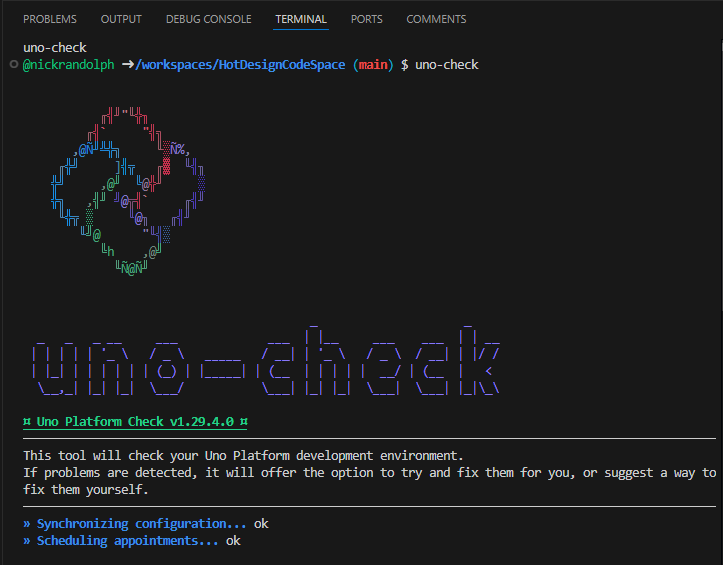
As uno-check runs, you can follow along in the Terminal and enter “y” when prompted to install the latest uno.sdk and the uno.templates.
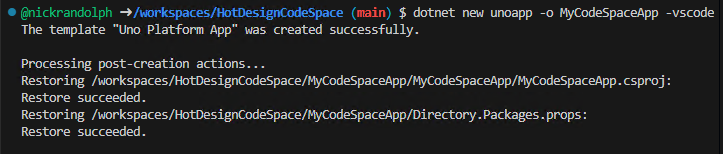
Once uno-check completes, we’re setup and ready to create the application. We’re going to use the dotnet new unoapp command to create a new application. The full command is
dotnet new unoapp -o MyCodeSpaceApp -vscode
If you want assistance with the various options available for the unoapp template, go to https://new.platform.uno/ and select the options you want. At the end of the process, you’ll have a dotnet new command you can simply paste into the Terminal.
In order for the Uno Platform tooling to work we need to open the newly created application by invoking Open Folder from the File menu, and then selecting the newly created application folder.
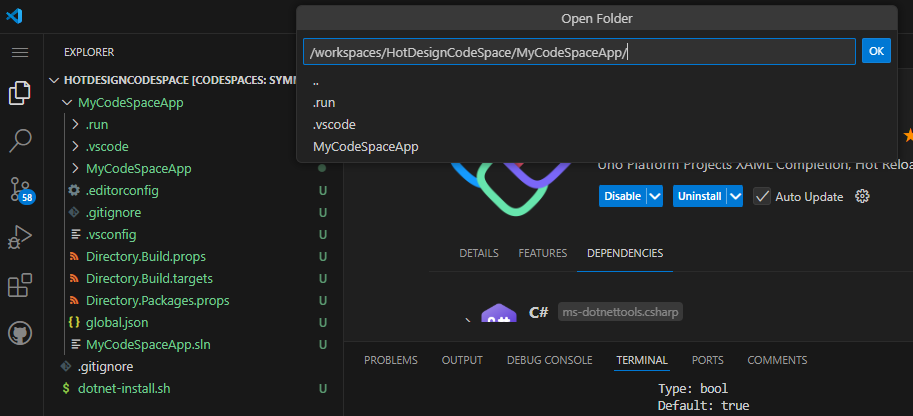
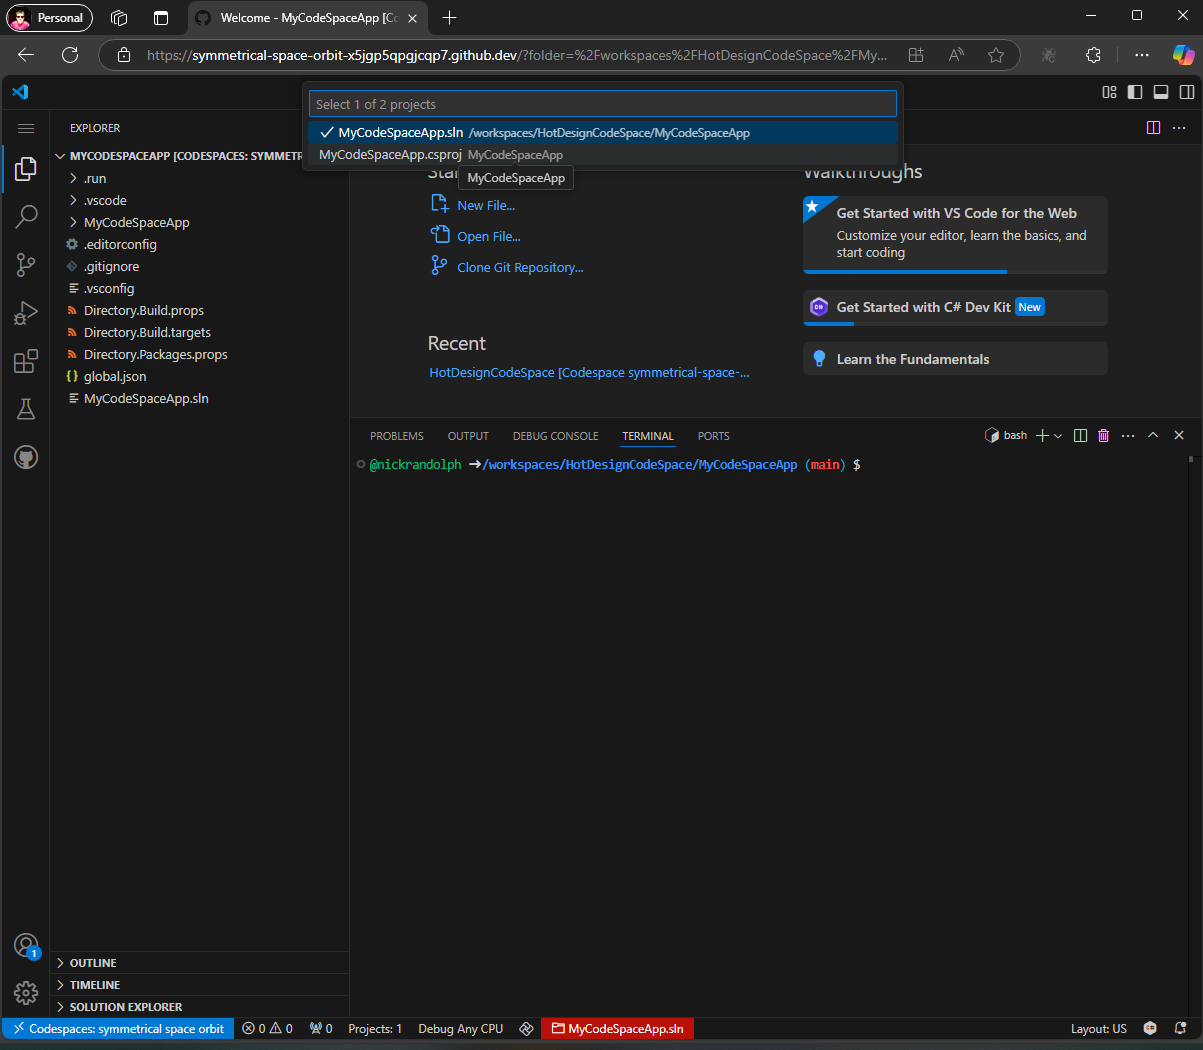
At the bottom of the screen you should now see the solution file highlighed in red – you need to click this in order to select the project file from the dropdown at the top of the screen.
At this point you may notice a prompt requesting that you register/sign-in – this won’t currently work as it will attempt to launch a skia desktop application (the team is aware of this limitation). For now to work around this, you can register and sign in via Visual Studio, VS Code or Rider, and then copy the license files into your codespace. The license files are located at C:\Users\{User}\AppData\Local\Uno Platform. Copy the whole folder into a folde in Codespaces by creating a Licensing folder, and dragging the files from File Explorer into the Licensing folder in Codespaces.
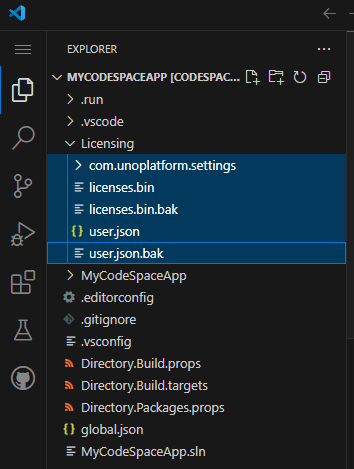
These file then need to be copied to the location where Uno Platform is expecting the license: ~/.local/share/'Uno Platform'. In the Terminal navigate to the Licensing folder than then invoke:
cp . -R ~/.local/share/'Uno Platform'
With the copied licensing files in place, they should auto-matically renew without a prompt. However, if the license does expire, you may need to repeat this process (at least until Uno Platform is updated to support signing in via a browser based app).
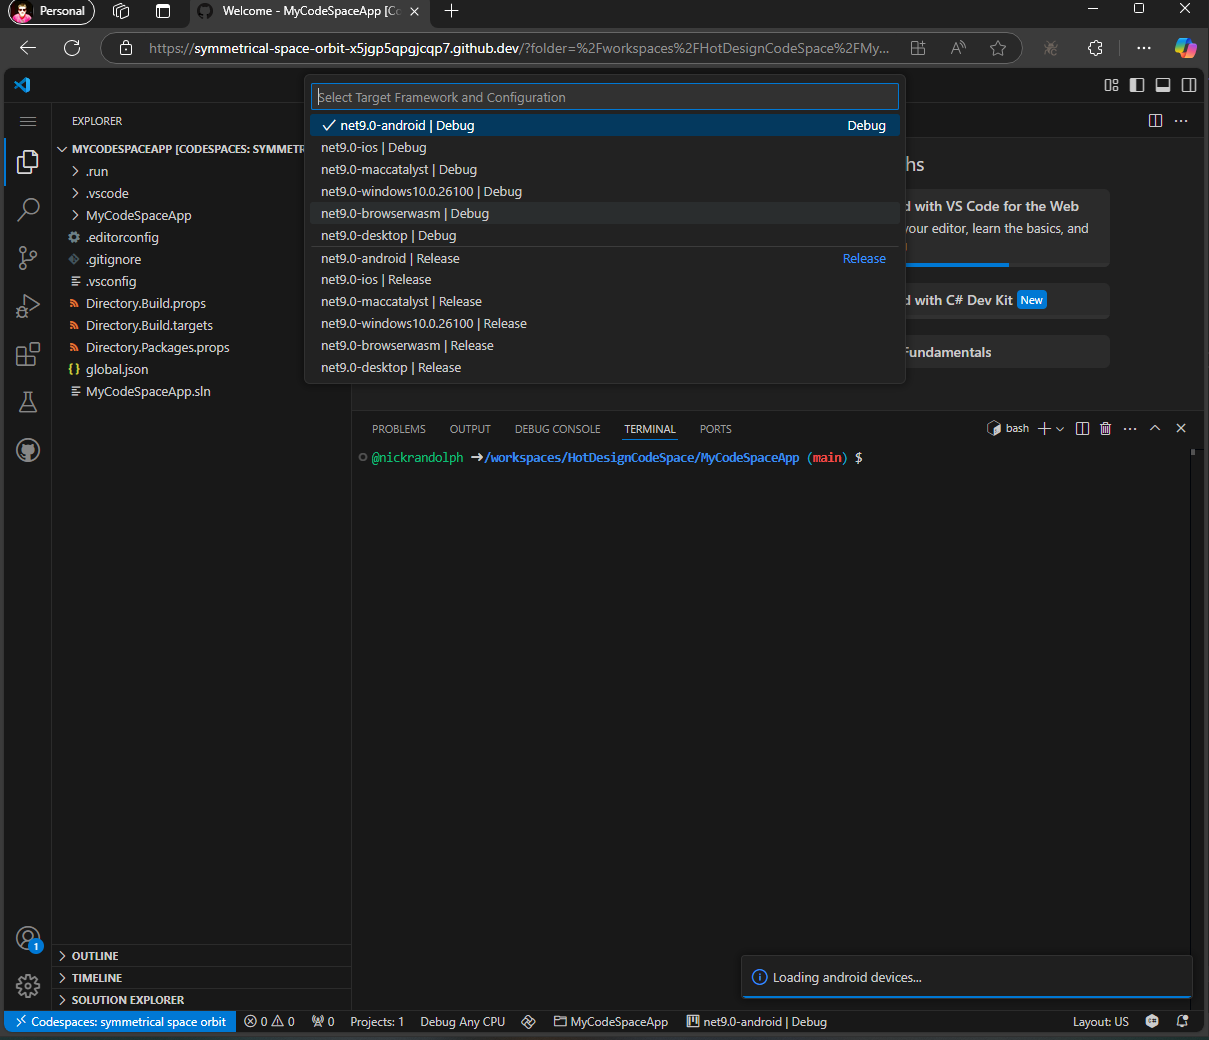
Before you can run the application, you need to change the target to .net9-browserwasm.
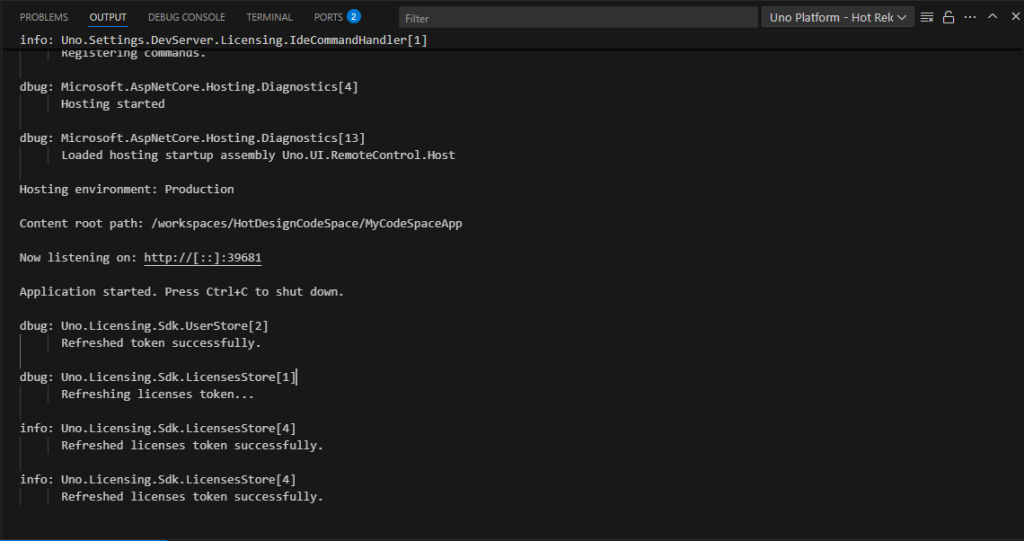
At this point, if you switch to the Output tab and select the Uno Platform – Hot Reload option from the dropdown, you should see that the license has been successfully refreshed.
Now we can go ahead and run the application by invoking
dotnet run -f net9.0-browserwasm
This will build and run the wasm target. Once it’s ready, a prompt will appear giving you the option to Open in Browser. Before doing this, you should click the Make Public button.

When you click the Make Public button, the notification will go away but you can still open the application in the browser by ctrl-clicking on the App url. This will successfully launch the application.
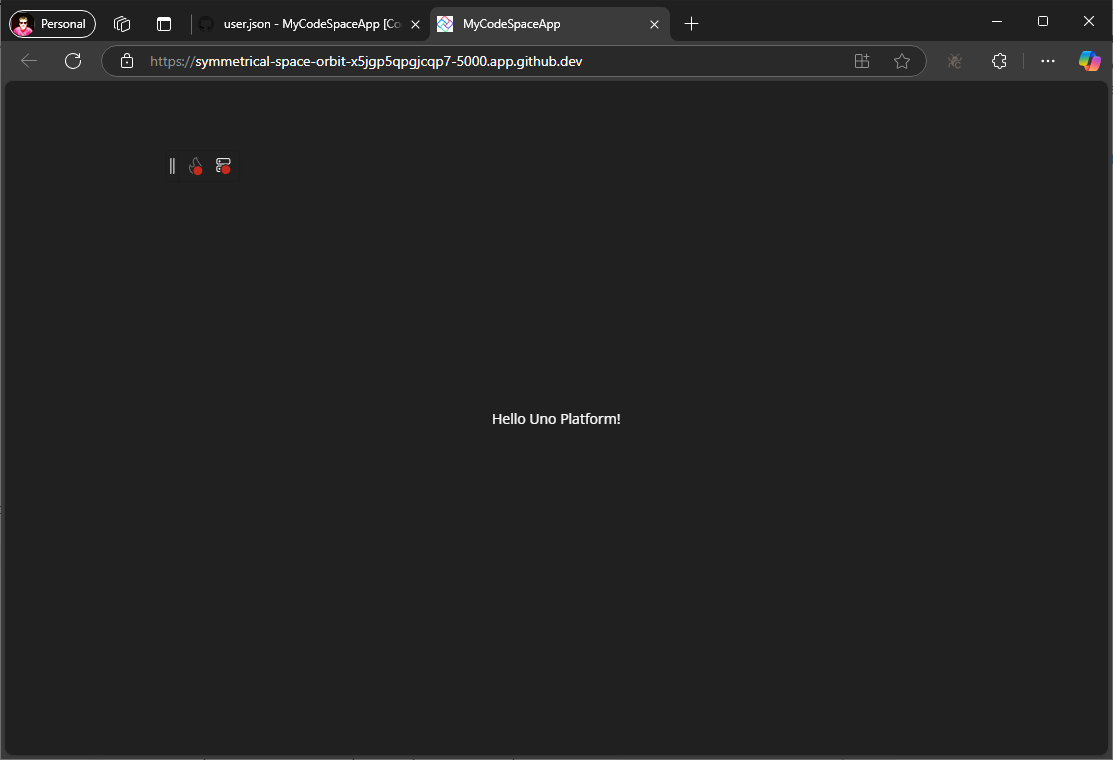
However, you’ll notice that both the Hot Reload and Hot Design buttons are red, indicating that they’re not connected correctly. To fix this we need to do two things back in our Codespace.
From the Ports tab, make sure that the Visibility of all ports is set to Public
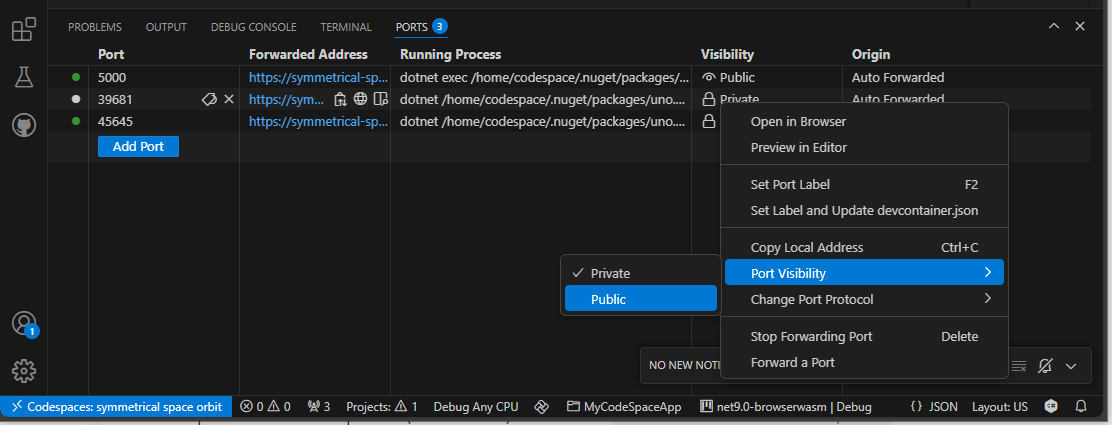
Not that you should only have two ports but if you happen to have an additional port (like in the above image) you need to return to the Output tab and confirm what port number DevServer is running on. In my case it’s 39681, so you want to make sure this port, along with the port for the web application (5000 in my case) are set to Public.

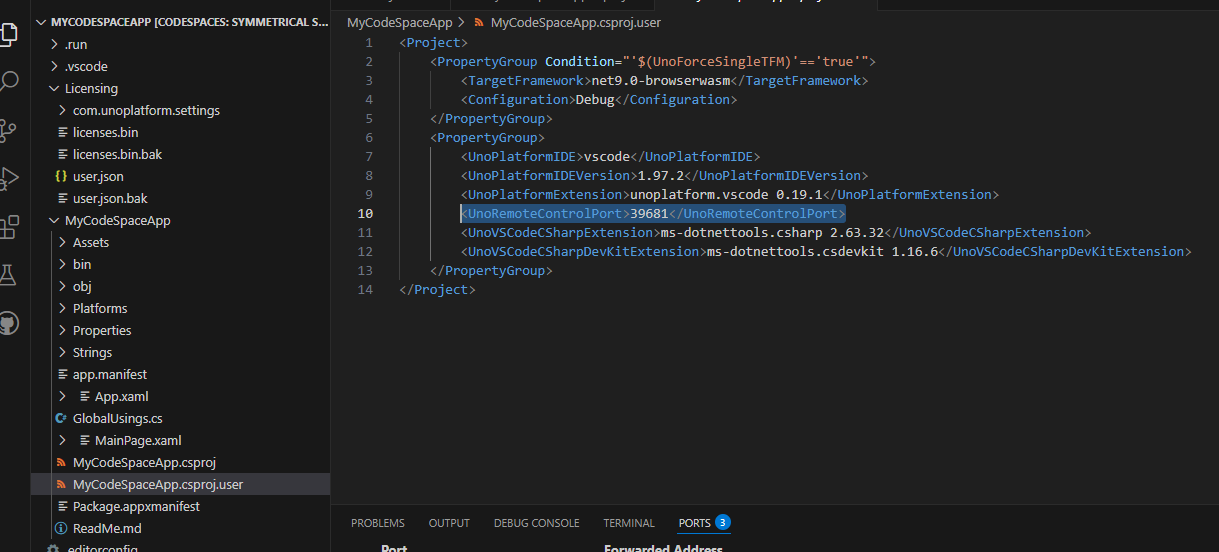
Ok, so the last thing we need to do is to compensate for an issue where the Uno Platform isn’t assigning the correct hostname during the compilation, meaning that Hot Reload isn’t connecting correctly. To fix this we need to add a couple of properties to our csproj file.
<UnoRemoteControlHost>symmetrical-space-orbit-x5jgp5qpgjcqp7-39681.app.github.dev</UnoRemoteControlHost>
<UnoRemoteControlPort>443</UnoRemoteControlPort>
Importantly, the UnoRemoteControlPort should always be 443. The UnoRemoteControlHost should be the Fowarded Address that correlates to the Port that DevServer is listening on. The port was 39681 in my case, so the UnoRemoteControlHost is symmetrical-space-orbit-x5jgp5qpgjcqp7-39681.app.github.dev.
Return to the Terminal and restart the web by rerunning the dotnet run command. In some cases, Codespaces will revert the web application port to private, so you may need to set that back to public.
If, after restarting the web application, the Hot Reload icon is still appearing red, you may need to remove the UnoRemoteControlPort from the csproj.user file.
Remove this line and save the file. Then restart the web application.
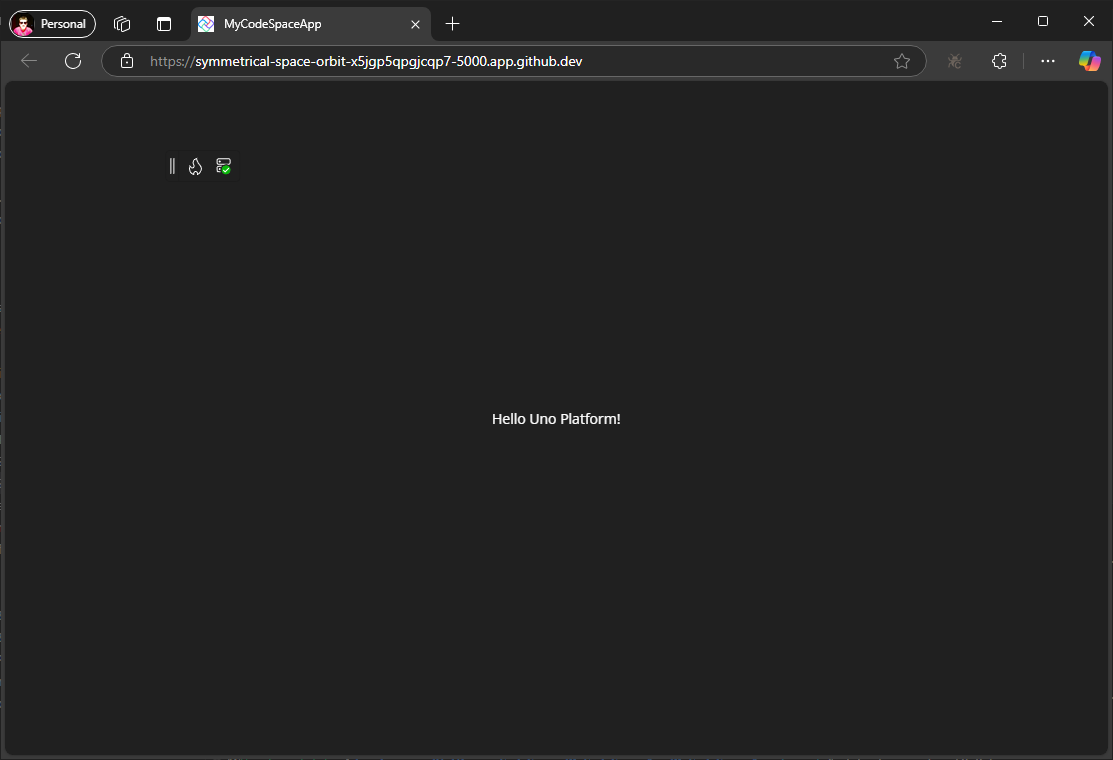
Now you can go ahead and click on the Hot Design button, and enter the design mode for your application.
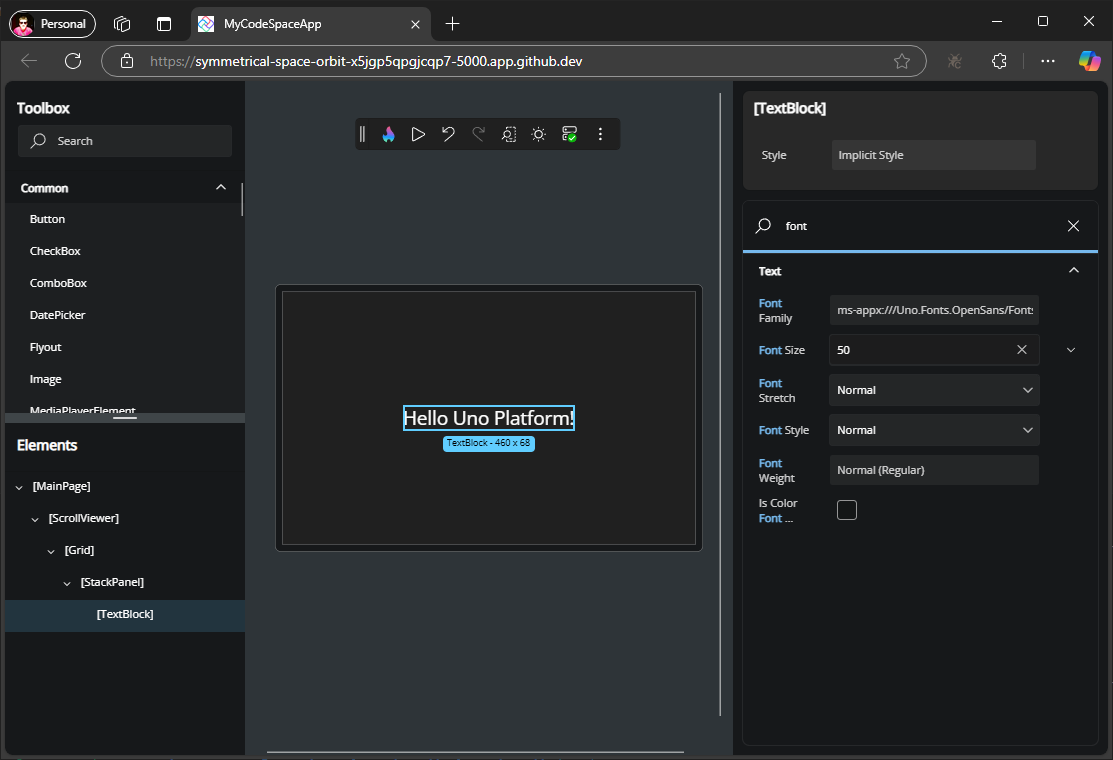
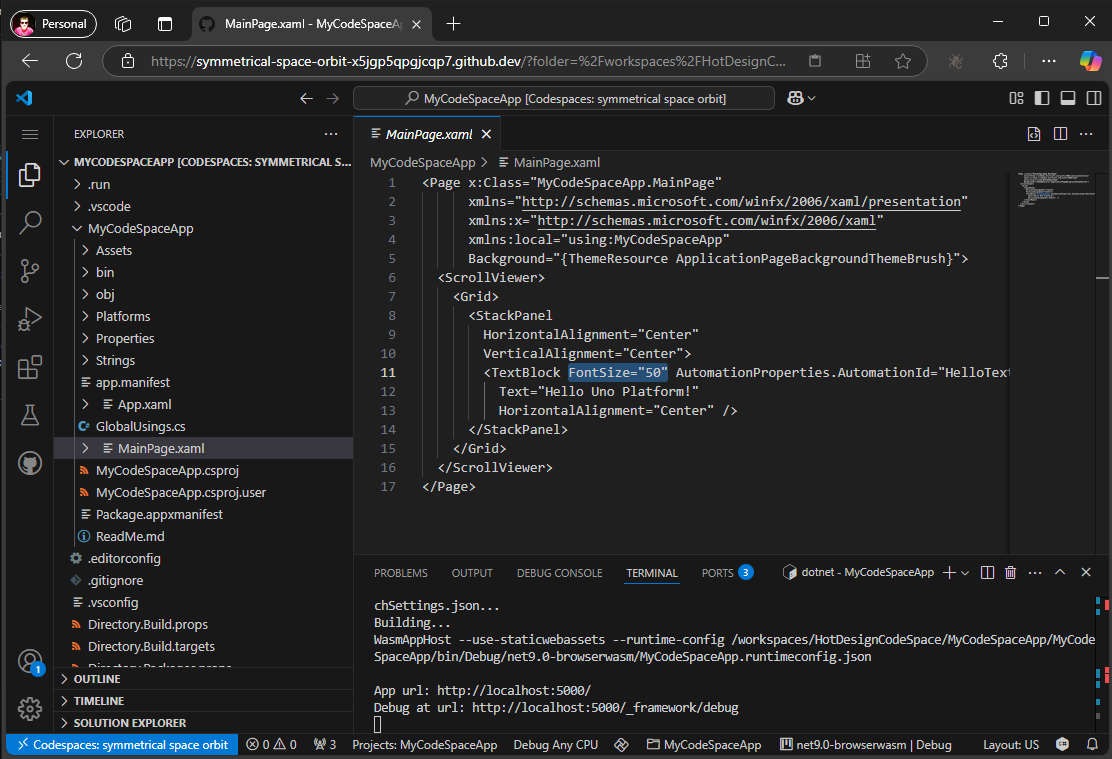
As you make changes in Hot Design, these are going to be reflected back into the XAML file(s) of your application.
As you can see, you can get from an empty repository through to a running application in Codespaces in a few minutes. There are a couple of rough corners right now, but expect that this process will get easier as we continue to roll out new and improved tooling for the Uno Platform. Also, don’t forget that in addition to creating a web application (WASM), you’ve also created an application that will work on Windows (WinUI and/or Skia), iOS, Android, Mac (MacCatalyst and/or Skia) and Linux.
This is an incredibly detailed guide on setting up Uno Platform in Codespaces! The step-by-step breakdown makes it much easier for developers to get started with cross-platform development. If anyone is exploring other lightweight and Python-based alternatives for UI development, I highly recommend checking out Flet GUI Designer. It simplifies building modern cross-platform applications with Python and Flutter, making UI design more intuitive and efficient. Excited to see more insightful posts like this!